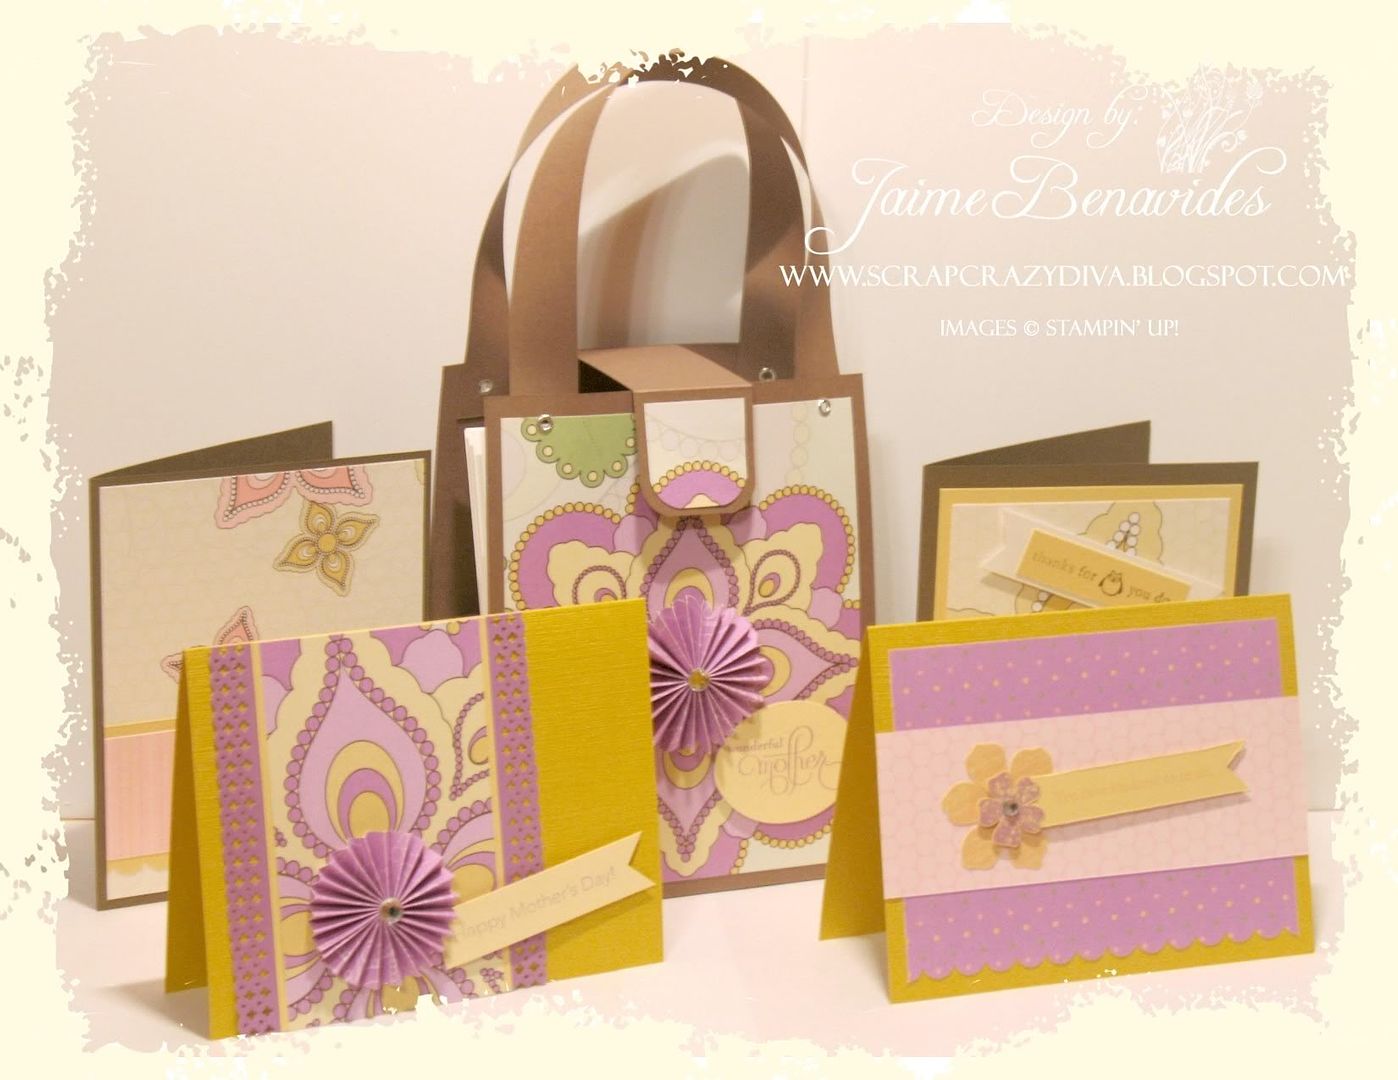
Yesterday, I decided to work on a 3D project and cards for a possible Mother's Day Class and I'm quite pleased. I was inspired by
Julie Buhler's card purse, but adapted it to suit my preferences.

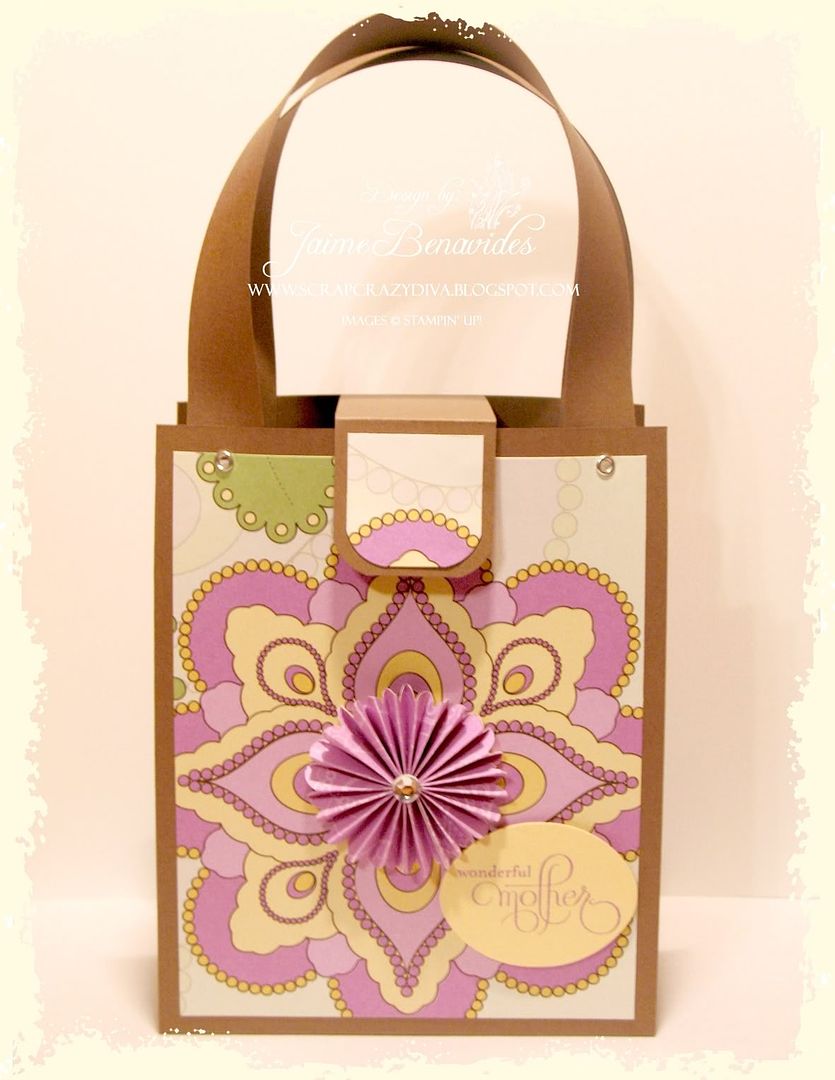
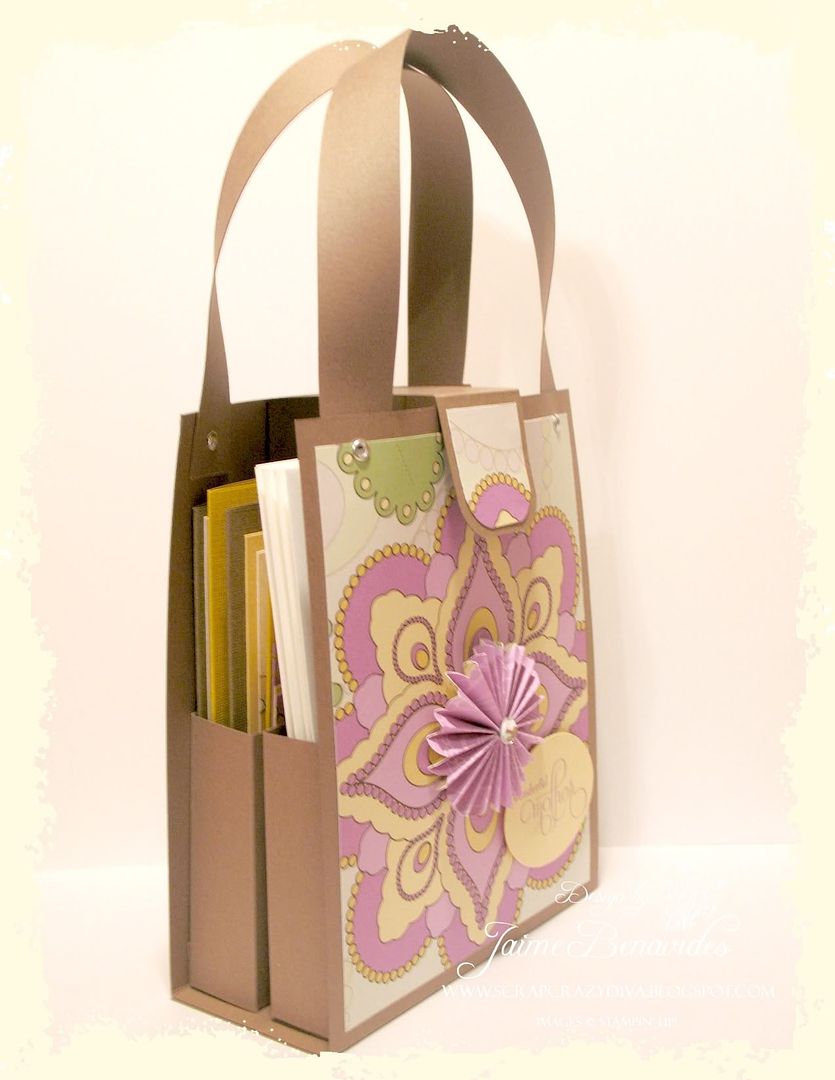
Here's some views of the purse:


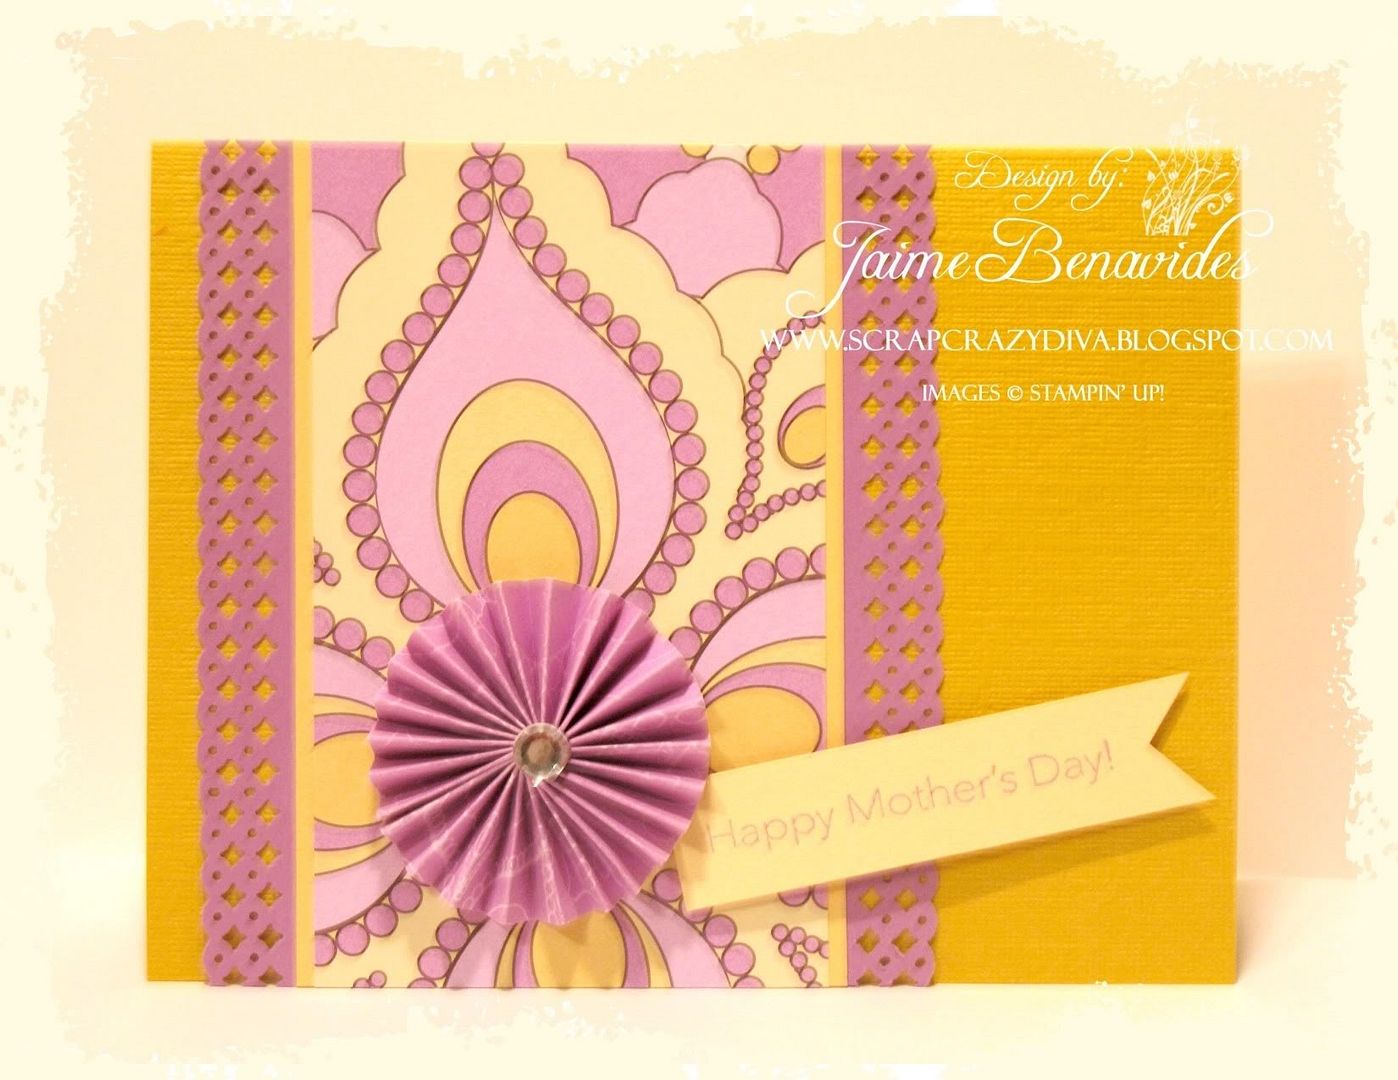
Here's Card 1:

Here's Card 2:

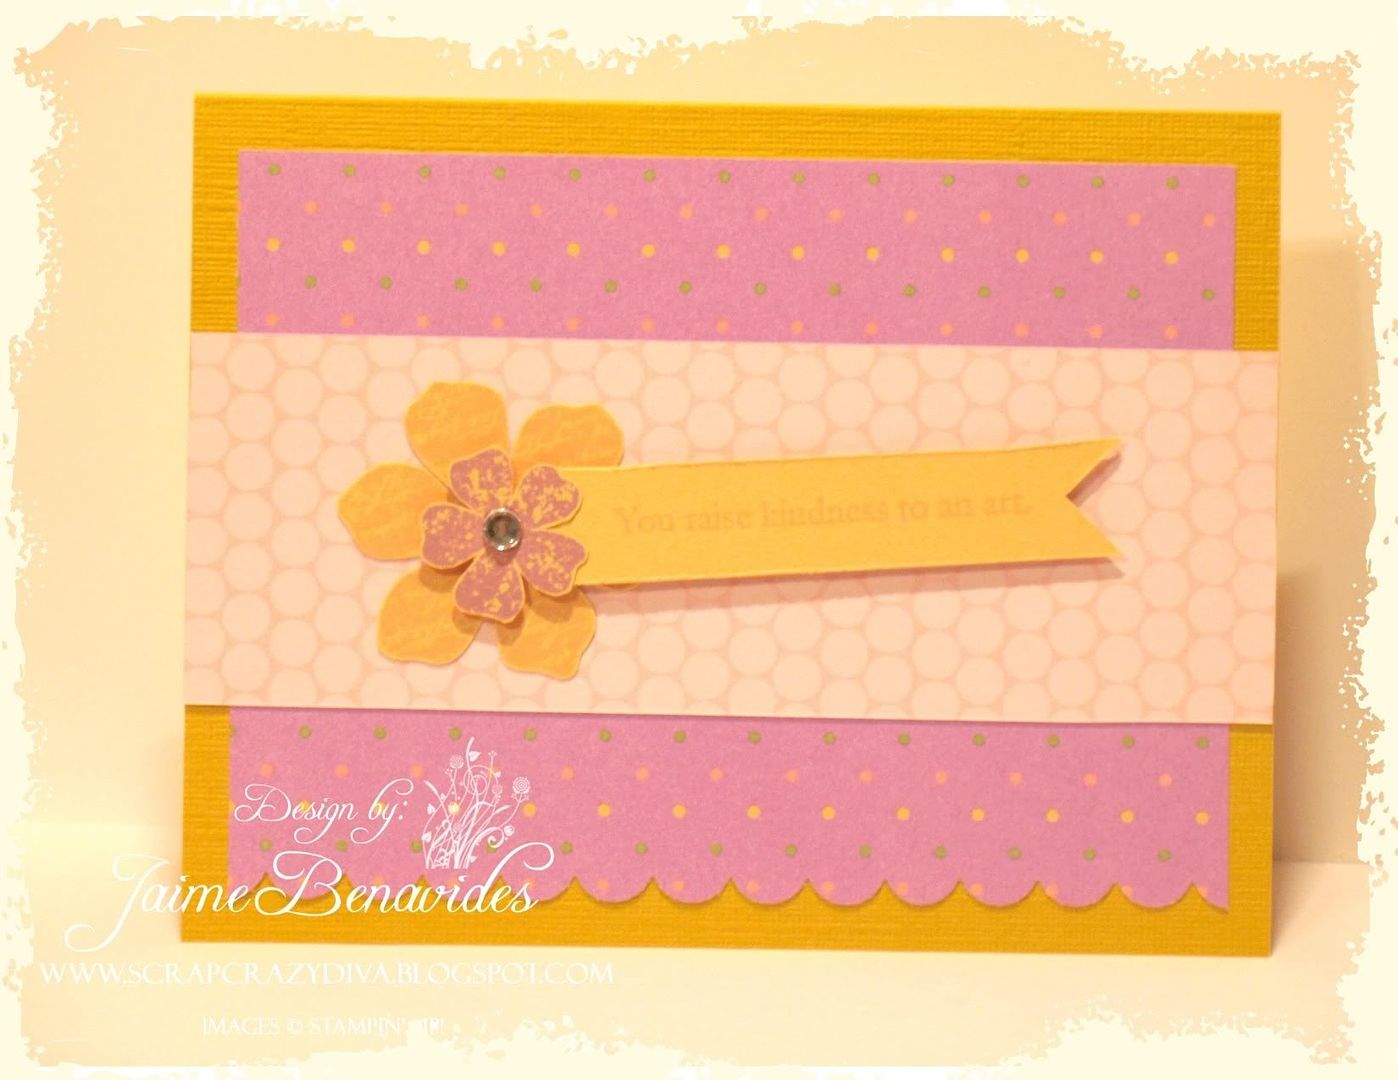
Here's Card 3:

Here's Card 4:
 All product used is Stampin' Up!, unless otherwise noted.
Paper: Close To Cocoa, So Saffron, Whisper White, Soft Suede Textured, Crushed Curry Textured Cardstock & Shades of Spring DSP
Stamps: Messages for Mom, Picture This, Vintage Labels, Vintage Vogue & Well Scripted (all Clear Mount Sets)
Inks: Orchid Opulance, So Saffron, & Pretty In Pink Classic Ink Pads
Chocolate Chip & Close To Cocoa Stampin' Write Markers
Accessories: Scallop Edge Punch, Wide Oval Punch, Crop-o-dile, Paper Snips, Snail Adhesive, Stampin' Dimensionals, Silver Eyelets, Parisian Punch (EK Success), Clear Rhinestones - Lg & Sm (other), Velcro Circle (other)
TUTORIAL
1 sheet of 12 x 12 cardstock cut into the following pieces:
(2) 5 x 8 1/2 - for base
(2) 3/4 x 11 - for handles
(1) 1 1/2 x 5 - for closure
1 sheet of 8 1/2 x 11 cardstock cut into the following pieces:
(2) 4 1/2 x 7 1/2 scored at 1/2 and 1 1/2 on three sides - for the purse pockets
Cut out the bottom corners at the innermost score line. Fold both score lines inward until you form a pocket. Add sticky strip to the outside of your outermost score line and adhere to the inside of your purse.
1 layer of DSP measuring 6 x 4 3/4 for the purse front, but you can use cardstock or any other layers you choose to decorate the front of your purse.
Score your pieces measuring 5 x 8 1/2 at 2 1/4 with the 8 1/2 along the top of your scoring tool.
On the cardstock piece measuring 1 1/2 x 5, score at 1 and 3 1/4 and round the corners of the cardstock on the end that will be your closure at the front of the purse. Adhere to the inside back of your purse base. Add velcro circle as your very last step (after you embellish your purse front).
Lay the two base layers together (make sure they're even) and glue them together by placing adhesive near the 2 1/4 score lines at the bottom.
Take your purse pockets and adhere them to the cardstock (make sure that you place them against the score line, but not on it). If you go over, it will not fold closed and will not stand.
Take your 3/4 x 11 strips scoring each end at 1 inch. Add sticky strip within the scored areas and adhere to the inside of purse by placing the scored line of the strip on the edge of the cardstock. You can add eyelets or brads for decoration if you choose, ONLY to the BACK of the purse!
Now, it's time to embellish the front of your purse...Once you've added all of your layers, you can finally add the eyelets or brads to your front purse straps.
YOU'RE FINISHED! Hope you liked my first tutorial EVER and you could understand it. If you have any questions, please don't hesitate to
email me.
As Always~
LIVE.LOVE.LAUGH.
getCRAFTY
!